
In the beginning (of the web) all websites were made with nothing but text and static HTML. Now though, over 20 years later, the web is a much different place. Websites are much more complex. They provide richer and more enjoyable experiences for site creators and visitors alike.
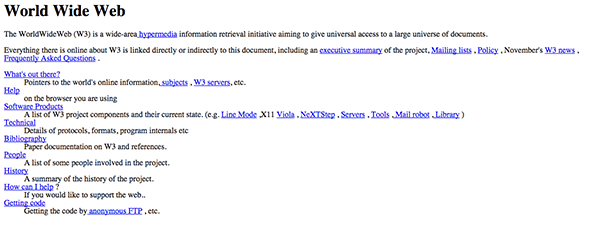
Check it out, the world’s first website! See it live here.
This is in large part thanks to open source projects like WordPress. Which, over the last ten years or so, has succeeded in its core mission to democratize online publishing (and a lot more in the process) so that anyone with a WordPress install and the right theme/plugins can have a modern website with advanced design and functionality. No coding–not even HTML!–required.
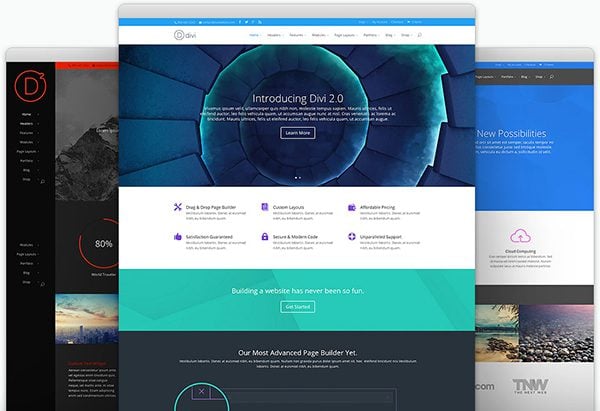
This is Divi by yours truly, Elegant Themes. This is one of the most advanced WordPress themes on the market today. And it requires zero coding ability to use!
This is why to avid WordPress users like myself, it’s almost hard to believe that in 2015 someone might still be operating a static HTML website instead of a WordPress website with a theme and plugins. But the fact is there are still a significant amount of active HTML only sites out there. (Or HTML with a bit of CSS.)
Granted, these site owners may have good reasons for not upgrading or converting. Maybe their site content never changes and the simple formatting and design already in place is serviceable? Or maybe it’s less of a hassle than worrying about keeping a WordPress site updated? Both are valid reasons (among others). Prime examples of, “Don’t fix what isn’t broken.”
However, I have a feeling that these might not be the primary reason some (perhaps many) haven’t made the leap. The most obvious one being that they simply don’t know how to convert their HTML site into a WordPress site. Especially without losing content or needing to do excessive formatting on a page by page basis.
Thankfully, as is often the case with WordPress, there are a number of ways to go about solving this problem. I’ve compiled some options below.
Your Options for Converting a Static HTML site to a WordPress site
How you choose to convert your static HTML site into a WordPress site will no doubt depend upon your personal preference, desired time/monetary investment, and skill level with code. You will have to be the one to decide which is best for you, but with the summaries below you should be able to decide quickly and skip straight to the most relevant information in this post for your specific situation.
There are three main options:
1. Manually create a WordPress theme based on your current static HTML site.
This will require you to get into your code. You will have to access your current site directory via FTP and use your existing code as a starting point. From there you will need to create the necessary files for a WordPress theme and copy bits of code from the WordPress codex. This is fairly simple and straight forward if you have some experience with HTML, CSS, and a bit of PHP.
2. Install a pre-made theme and simply migrate your content.
This is probably the best option at the intersection of simplicity and value. Assuming you already have hosting for your current website, you will only need to spend money if you choose to purchase a premium theme. The plugin we will use for importing content is freely available in the official WordPress Plugin Repository.
3. Paying to have an HTML to WordPress conversion service re-create your site.
This is the easiest solution, as it doesn’t require you to do much of anything. However it will not do much for familiarizing you with WordPress and the cost will vary depending on who you choose to hire. I won’t be covering this option in the sections below because if this is the route you are interested in, you can simply do a quick search for service providers and they will take care of the rest.
Preparing for HTML to WordPress Conversion
No matter which route you decide to take below, there are a few things you will want to do before diving in.
The first is choosing a hosting plan. You’ll want to look over the options that are out there and decide on a package that best fits your needs. Or perhaps you’d like to create a local WordPress installation instead? You can always migrate it to a hosting service later.
Once you’ve chosen, you will need to install WordPress and log into WP Admin. This is the point at which our two possible paths divide.
Manually Converting Your Static HTML Site to WordPress
If your goal is to not only get your content from your static HTML site into WordPress but also duplicate your current design, this means you will need to create your own custom theme. Thankfully, that is not as scary as it might sound at first. It only involves creating a few folders and files, a bit of copy and paste, and then uploading the result.
You’re going to need a code editor such as Sublime or Notepad++ and access to both your HTML site’s directory and your new WordPress install’s directory.
Step 1: Create a New Theme Folder and Necessary Files
On your desktop, create a new folder to hold your theme files. Name it whatever you’d like your theme to be named.
Next, create a few files (which all go in your new theme folder) in your code editor. Don’t do anything to them just yet. Just leave them open for further editing.
- Style.css
- Index.php
- header.php
- sidebar.php
- footer.php
Step 2: Copy Existing CSS Into New Stylesheet
If you’re looking to duplicate a design, this probably means you have at least some CSS that you want to save. So the first file you’re going to want to edit is your Style.css file.
To begin, add the following to the top of your file.
/*Theme Name: Replace with your Theme's name.Theme URI: Your Theme's URIVersion: 1.0Description: A brief description. Author: You*/Author URI: Your website address.
After this section simply paste your existing CSS below. Save and close the file.
Step 3: Separate Your Current HTML
Before we get into step three, let me give you a quick note on how WordPress works. WordPress uses PHP to call and retrieve pieces of data from its underlying database. Each file that we’re using in this little tutorial is designed to tell WordPress which part of your site content is to be displayed and where.
So when I say we are going to “chop up” your existing HTML, what we’re actually doing is simply cutting and pasting parts of your existing code into the different files we’ve just created, so that WordPress will know where to display them.
Here we go.
First, open your current site’s index.html file. Highlight everything from the top of the file to the opening div class=”main” tag. Copy and paste this section into your header.php file, save and close.
Second, go back to your index.html file. Highlight the aside class=”sidebar” element and everything inside it. Copy and paste this section into your sidebar.php file, save and close.
Third, in your index.html select everything after your sidebar and copy and paste it into your footer.php file, save and close.
Finally, in your index.html file, select everything that’s left (this should be the main content section) and paste it into your index.php file. Save, but do not close yet.
You can close your index.html file now however and move on to the final steps. Almost done!
Step 4: Finalize Your Index.php File
In order to finalize your new theme’s index.php file you need to make sure it can call up the other section (besides the main content) that are housed in the other files you’ve created. Or in other words, put back together the elements we just “chopped up”.
At the very top of your index.php file, place the following line of php.
Then, at the very bottom of your index.php file, place these lines of php.
And finally, we have to add what’s called The Loop. This is the primary bit of php that WordPress uses to display your post content to visitors. So the final step in creating your new theme’s index.php file is adding the code below within the content section.
Save your index.php and close. You’re theme is now finished! All that’s left is to upload it to your WordPress website.
Step 5: Upload Your New Theme
Now that you’ve created your theme files and have them all stored within your new theme folder, you’re going to need to access your new WordPress install’s directory.
Place your new theme folder inside /wp-content/themes/. Then navigate back to WP Admin > Appearance > Themes and your newly created theme should appear there. Go ahead and activate it!
All that’s left to do at this point is populate your new WordPress website with your old site’s content. Follow along with the section below (skipping over the part about using a pre-made theme) to see how that is done.
Using a Pre-Made WordPress Theme and Importing HTML Content
If the steps above seem too intensive or time consuming to you then rest assured, there is another way. Instead of converting whatever design you happen to be working with right now into a WordPress theme, you can take advantage of any one of the thousands of themes available in the broader WordPress marketplace.
There are free themes and there are premium themes. Before deciding which is best for you, you may want to read up on which themes are designed to cater to your needs and browse by theme category here at Elegant Themes and elsewhere.
Once you’ve chosen a theme you like (and have its zipped file package downloaded) you’ll want to head back to WP Admin > Appearance > Themes > Add New and install/activate your new WordPress theme.
Once this is done, you will have a new WordPress website and theme–but little else. When you preview your site, it will be empty of content and probably look sort of boring. That’s ok, because next we are going to import your old site’s content.
In WP Admin go to Plugins > Add New and search for a plugin called HTML Import 2 by Stephanie Leary. Once this plugin is installed and activated, follow its handy user guide to import your entire directory of HTML pages. Complete with images!
After this you will have all of your old content living on WordPress and formatted by your new theme. Or, if you created your own theme above, your site should pretty much look like it did before–just running on WordPress.
In Conclusion
If you’ve used this post as a guide for migrating your website onto WordPress then you’ve just joined one of the largest open source communities in the world. Welcome! It’s a fun place with lots of developers, designers, bloggers, DIYers, and more–all building, playing, and creating with WordPress and WordPress themes/plugins.
If you’ve “caught the WordPress bug” the official WordPress.org website is chock full of useful themes, plugins, and other resources. If you’d like to further tweak your theme files, explore the Codex for seemingly endless tips, tricks, and variations.
And of course we hope you’ll stick around to chat in the comments below and subscribe for more blog posts in the future.


