
Drafting and publishing posts on your blogger.com blog takes time. Make it easier. Define your own CSS styles and use them over and over in articles.
[caption id="" align="aligncenter" width="300"]
 How To Add Your Own CSS Styles To Blogger[/caption]
As a matter of fact, adding your own customized CSS styles to the template and using them in posts is possible and does not require advanced knowledge of blogger.com.
Here is a very simple example of what can be done using customized styles in blogger.com:
This Is My Favourite StyleLet's see how it can be done.
How To Add Your Own CSS Styles To Blogger.Com
Step #1:
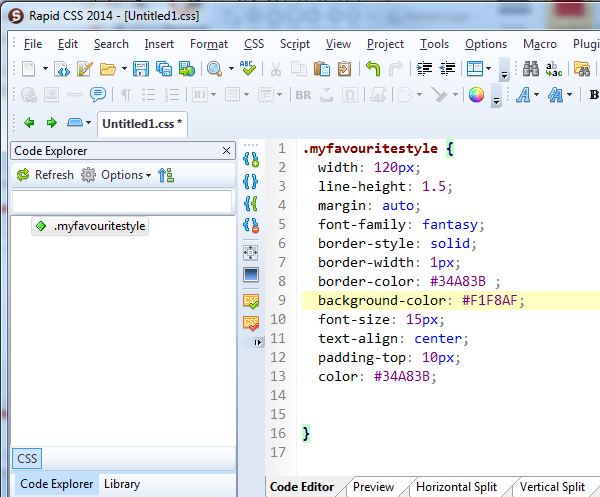
Prepare the CSS style, you want to use in your posts. To do that, if you do not know much about CSS, use one of the many CSS editors that can be found on the web. For the exemple I used RapidCSS. Here is how I prepared the CSS style 'myfavouritestyle' I used in the exemple:
Step #2:
Clic on it to expend
Step #3:
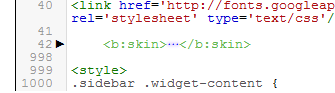
Go to the end of the section and paste the style you have created with the editor (before ]]</b:skin>).
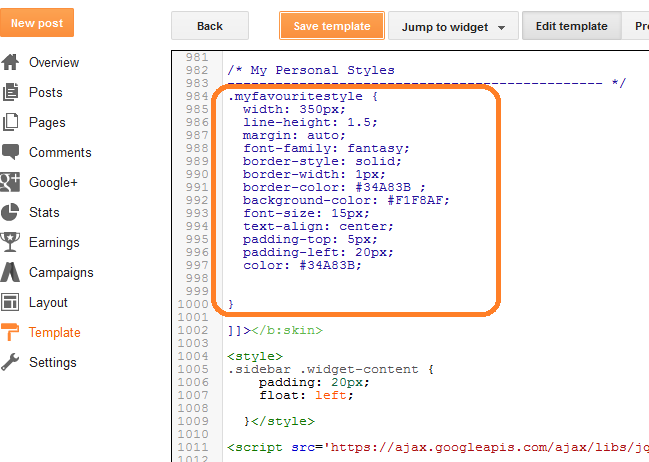
You can add a comment (in the exemple "My Personal Styles")so you can retrieve your customized styles easily in the future. Just remember that CSS comments must start with '/*' and ends with '*/'.
Step #4:
The last step is about the use of customized styles in posts. Once the text is entered (using 'compose'), select the text you want to highlight with your customized style, select the format (heading, subheading, minor heading) and switch to HTML view. Your text appears between two tags:
<h2> et </h2> for headings,
<h3> et </h3> for subheadings,
<h4> et </h4> for minor headings.
In the exemple, I selected minor heading; therefore the text 'This is my favourite style' appears surrounded by a <h4> opening tag and a </h4> closing tag in the html view.
To apply the customized style, you just have to add the class property to the opening tag as in the exemple:
That's it.


Would love to here from you...